Showing posts with label Westrail. Show all posts

Monday, May 22, 2023

Westrail WQL flat wagon 

Adding to my collection of S scale flat wagons is this model of a WQL flat wagon.

Westrail had a fleet of 62 WQN class wagons capable of carrying 2 x 20’ containers, the builder Goninan also proposed a lengthened version to fit 3 x 20’ boxes.

This S scale model is based on that proposal and the WQL designation is made up.

Construction is mostly from styrene strip and shapes with American Models Barber roller bearing bogies and MTH wheels. The couplers are Kadee HO #118’s with the glad hand removed and set at the correct height for S scale. Archer 3D decals were used for the weld lines and floor plate patterns.  The combined air reservoir and valve were 3D printed while the air hoses, brake wheel and gearbox came from DPH. The brake pipe unions are from Precision Scale Company.

The model was finished with Vallejo Chrome Yellow and decals printed at home, apart from the Westrail logos which were kindly printed for me by John Miller.


AQNY (formerly WQN) flats with the WQL


Wednesday, August 25, 2021

A new layout - Lower South West: Part 1

 Hi everyone,

As many of you know I have been living on the East Coast for many years, however I have harbored the desire to build a Western Australian layout one day. Many plans have been draw up, many ideas thrown around. The layout went from a recreation of the Wagin - Lake Grace - Newdegate branch to something much more manageable - the Lower South West. 

Any layout I build has to have a junction. Junctions add so much to a layout, both in design and operation. It give you the opportunity to have a main line and branch line, have different classes of locomotive for heavy and light lines, shunting, a loco depot, etc etc. WA had many junctions, from major (Midland, Northam, Narrogin) to minor (Amery, Goomalling, Yillimining). After much though I picked Wonnerup in the states South West. This gave me the opportunity to model Busselton (an interesting place) and the timber branch to Nannup. After many attempts the final plan came together as below. 

This layout fits nicely into my 6m x 6m garage (the cars now live outside) with enough room for a table tennis table. Wonnerup is basically as it was in the early 80s, without the compound / double slip point. I only had room for the Busselton town yard unfortunately, and one track had to go, however the general feel of the place stays the same. With Nannup the yard is right, but the line to the timber mill runs off to the side of the yard rather than the end, again due to space. 

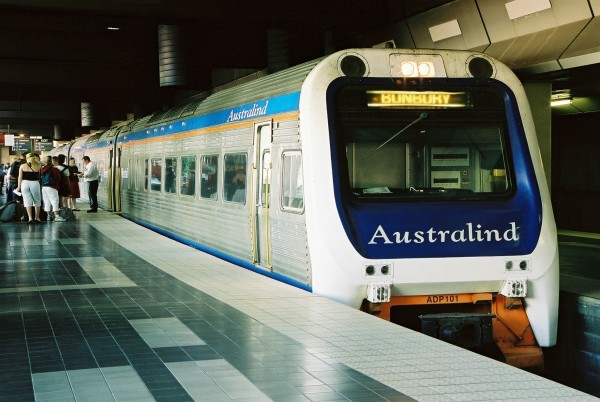
I've decided to set the layout in the mid 1980's - with a little modellers license. The mainline has been upgraded to take 16t locos in the assumption of more mineral sands traffic and the Australind beginning to run through to Busselton. So the main will be metal ballast, but the branch will remain 11t axle load, gravel ballast. This gives me great scope to run my DA and AB locos on the main, and the X and Y class locos on the branch. So lots of loco swaps, shunting and mixed running - everything I like in a layout.

I plan to update this blog as I go, although construction is a bit stop start depending on work, uni studies and volunteer commitments. However I will post next month on the disastrous start to the construction and the new methods I used to build the baseboards. I hope to also cover the building of the points - all have been handmade using the FastTracks jigs (which are fantastic and cannot be rated highly enough). 

Cheers, Cris


Monday, March 7, 2016

Westrail/ARG WQN/AQNY


Westrail introduced the 61 strong class WQN standard gauge flat wagons in 1998 and they were manufactured by United Goninan at Bassendean.
Each wagon carries 2 - 6.1m containers for use on the Sulphur train between Kwinana and Malcolm siding.

Loaded AQNY 32208Y at Kwinana.

Empty AQNY 32209A at Kwinana.
The model is depicted post 2012 after reclassification to class AQNY under ARG ownership. 
It is primally constructed of sheet styrene; 0.5mm for the side webs which then narrow down to form the centre sill over the bogies. The top & bottom flanges are 0.4mm & 0.25mm thick styrene respectively. Sections of sheet brass were added in the end platforms for strength and after the styrene angle braces were added the body felt much stronger.
American models roller bearing bogies, NWSL wheels and Kadee HO No. 118 couplers were used.  The air brake reservoir was 3D Printed by i.Materialise and the brake piping was added with 0.04 & 0.05 phosphor bronze wire from Tichy. The brake wheel & gearbox were from Detail Associates (now discontinued) and attached to a stand made from styrene angle.

A construction photo
primer coat - in the spray booth 
Prior to weathering


second attempt at weathering the deck - this time with rust coloured pigments


The model was airbrushed using Vallejo Desert Sand acrylic primer as a base and Polly Scale Railbox yellow, followed by a light coat of Polly Scale CN Yellow No. 12 on the sides, all thinned with their respective thinners. The CN Yellow is quite a good match for the Golden Yellow used by WAGR and later Westrail. As the Polly Scale line of paints have now been discontinued the CN Yellow was rationed and the final weathering will cover most of the Railbox Yellow colour.

I created by own artwork for the decals and had them printed through Westland Models, using  Microscale Decal Set to settle them down to the paint. Details were pickd out with Lifecolor paint, using black, white orange & rust dark shadow.

Finally a coat of Model Master clear flat was applied to seal & protect the decals and hide the decal 
film, weathering was done with a selection of Lifecolor acrylic brown paint and pigment powders.

Next project are the containers...

GS

Sunday, May 22, 2011

The Australind Railcars

The Australind in original Livery. Photo Simon Barber
The Australind prepares to leave Perth Station for Bunbury in 2001.Photo David Johnson 

The Australind is one of Western Australia’s named trains, the other two being the Prospector (Perth-Kalgoorlie) and the Avon-link (Northam-Perth-Northam and Merredin). In 1987 a brand new set of railcars was introduced to the Bunbury- Perth,  route replacing the older locomotive hauled Australind coach set which had its inaugural run in 1947.

The Australind arrives at Bunbury after having serviced at Picton. Photo David Johnson

Transwa four car Australind Mundijong. Aug 2008.


The Australind comprises a set of five railcars, three driving trailers and two non-driving centre cars. All cars are powered by under-floor diesel engines and the train usually runs as a four car set with the fifth driving trailer stored at Picton as a spare.  The set of five cars have given fast, comfortable and reliable service between Perth and Bunbury for 24 years. They have been generally well maintained and have had several liveries in that time. They were refurbished in 2008.  The journey is 185kms each way and usually takes about 2½ hours depending on the number of stoppages en-route.


In 1996, following a school holiday trip to Bunbury on the Australind, I decided to build a model of the train in Sn3½. The task was rather ambitious but I managed to complete the project in 12 weeks. I managed to obtain the outline drawings from a friend who worked on the internal fit-out of the cars at Comeng in Bayswater.  I took a number of photographs, several being of the roof from the Queens Park footbridge as the train passed underneath at about 70-80km/hour!

 
The bodies were built in styrene using Evergreen board and batten siding (1mm thick and 1.9mm spacing). The roofs were urethane castings produced from a pattern made from styrene. All the roofs were identical except the driving trailers which had slightly shorter roofs due to the sloping driver’s compartment. I was able to simply cut them to length at the un-detailed end. The driving ends of the driving trailers were vacuum formed in styrene over patterns I carved and shaped from wood.  I would have liked to make patterns for the sides of the cars but they were all a bit different and had tumble homes which made urethane casting somewhat problematic.


The running gear came from a Lima HST 125 set which I had and was willing to sacrifice. In a three car set there is 12 wheel electrical pick-up (6 and 6). I have all the bits for the second non-driving trailer but never quite got round to it….as yet. The coaches were painted in silver using my air-brush and the blue/red decal strips are hand-made using painted decal paper. The West-rail decals are from MnJ decals. The windows are flush-glazed using stickers to mask the windows. The Australind name board lettering is from a photo of the front of the railcar sets which I took on my old SLR camera from about 50’ with a 50mm lens. It was before the days of digital cameras and scanners after all.

The couplers between the cars are made from brass strip which allow for electrical connectivity. The Motor bogies are both under the centre, non driving trailer. The end couplers, front and rear are Kadees but are really only for cosmetic purposes. The model of the Australind set is now fitted with a DCC decoder but it ran well on DC in earlier days.    


Stuart Mackay