Friday, December 20, 2013

AV Dining Car - Under Floor Detail

Underneath the AV Dining Car is another subject of interest, so here is what I found for completion of my model of the AV whilst on a visit to the ARHS Museum.


Under floor detail AV 425 from Dining End Corridor side

Under floor detail AV 425 from Galley End corridor side
 
Essentially the detail underneath the Dining car is symmetrically balanced consisting of 4 Battery Boxes, 2 Water Tanks and 2 sets of Brake Gear.
Under Floor AV 426 Model
 
In S scale measurements, Battery Boxes are 37mm long and can be purchased from Railwest as their "Long" battery box. The Water Tanks are 28mm long and can be made from a section of 7.9mm Evergreen tube #230 with some #100 strip for the support straps. Railwest also supply Vacuum cylinders and V hangers to suit.
Av 426 Model Under floor Detail locations
The Battery Boxes and Water Tanks should all fit within the cast areas of the frames . The Water Tanks should be positioned with one end against the center frame casting and hang with 5.5mm of tank exposed/visible below the sole bars.
 
V hangers should be mounted on the external surface of the outside frame with the inside V on the inside frame 2/3rds over the center of the carriage frame. Vacuum cylinders are a close fit to the V hangers with a distance of 7mm between the cross bar and center of the cylinder.
Brake Gear  & V Hangers
The older style carriage Queen posts are also available from Railwest as is .7mm brass rod for the tension bars.

With any luck this information combined with the roof detail information, will enable completion of a few more models of the AV Dining Cars.
 

Saturday, December 14, 2013

AV Dining Car - Roof Detail


 In recent times I have been asked by some members of our group about how I achieved the roof detail and its positioning on my model of the AV Dining Car. This was a problem that I faced back in early 2010 when I was looking to complete my own model of AV 426.
 

 WAGR - AV 426 Dining Car Model
 
Whilst discussing my problem with Rob Clarke who is a member of the ARHS Museum, it was suggested that we could go and measure the real thing at the museum. The agreed day arrived and I met Rob (who had come armed with a ladder) at the Museum and we climbed up onto the roof of AV 425 and carefully set about the task of plotting the positions of the roof equipment.
 
Here is a few prototype pictures showing what is on the roof
 
Kitchen End Stove Vents to right
Looking from Kitchen End over Dining Room
 
Kitchen End showing Galley Vents to left
 
Ok now that you have an idea of what is on the roof, next is to provide the important measurements  & modeling tips. All measurements shown are in millimeters. I have calculated these from the actual 1:1 measurements to suit placement onto the model.
 
To begin with you need to mark out the centerline of the roof.
 
As shown in Picture 1 below - From the kitchen end, measure and mark the positions of the standard Flettner ventilators that run the length of the coach.  
 
 
Picture 2 shows the position of the Stove vents using the first Flettner vent at the kitchen end as the start point for locating. First measure and mark the offset line and then mark the vent positions.
 
  
Picture 3 Shows the location of the Galley Vents again using the first Flettner vent at the kitchen end as the start point for locating. Measure and mark the offset line and then mark the vent positions.
 
 
On the roof I used WestOzModels Flettner Vents for the standard centerline vents
 
 Railwest's brass large carriage vents were used for the stove vents.
These need to have mounting plates to enable them to sit level on the curve of the roof and can be made from laminated styrene sheet or perhaps an old style knitting needle or similar solid rod sliced and filed to suit the arch of the roof. 
 
For the Galley Vents and Water Filler (on the Bullnose end) I used some styrene sheet circles cut to size with a smaller circle with the edges filed or rounded off and then glued on top of the larger circle to represent the lid on top of the mounting plate. To fit on the roof, some light filing with a rounded file will be needed on the bottom of the vent to suit the roof arch particularly on the bullnose end.
 
Here below is a close up picture of the Water filler. The Water filler and the Galley Vents are very similar being mounted with a 6.34mm diameter base. The diameter of the "Lid" is 5.35mm for the Galley Vents and 4.56mm for the Water filler.
 
Water Tank Filler
 
Another feature amongst the Galley vents is the long rectangular vent. Whilst the earlier coaches seem to have been fitted with 5 round vents, it would seem that a longitudinal vent was later fitted presumably for better air collection whilst travelling.
The picture below shows these vents fitted to AV 425,426 & 286. Note that the version on 286 is low and flat compared to the round top versions on 425 & 426.
The measurement for the long vent on AV 425 is 9.52mm Long, 4.36mm wide and 3.37mm high.
I constructed this from 4 sections of 2.5mm sq Evergreen strip styrene glued together and then filed to shape and then I used a dremel with a sharp point bit to mark in some vent veins on the ends
Long Vent
 
Hopefully the information I have provided above will help you all to be able to complete those dining cars you have been working on.
 
As with all of the WAGR carriages there are many variations with fittings etc that will always present us as modelers with a challenge. As always it is best to find a good picture of the prototype you are modeling and follow what you see.
 
A big thank you goes out to Rob Clarke for his assistance with access and measuring of the roof  fittings on AV 425. I promised Rob at the time that this info would be shared with all who may need it and thanks to this blog it has now been possible in a better way than could have been imagined at the time.
 

Friday, October 18, 2013

Handlaid Points

The latest project on my workbench is a No.6 left hand point.  This one uses Code 83 rail (equivalent to 82 lb/yd rail in S scale).

Construction follows the same techniques I have been using for well over 30 years, with real wood sleepers and gluing the rail down with Pliobond adhesive.

Although I usually use Northeastern 12" x 6" HO scale lumber for the sleepers, this time I used precut On3/On2½ "switch ties" by Mt Albert Scale Models in Canada (available from The Railcar near Newcastle, NSW).  The thickness of the Mt Albert sleepers closely matches the On2½ flexible track and points available from Micro Engineering.  Prior to construction, I stained the sleepers with potassium permanganate solution.

The sleeper size and spacing of the Micro Engineering On2½ flexible track and points are just about spot on for Sn3½ track, except that the sleepers are 4-5 mm too long, but that is fairly easily fixed by trimming the ends of the sleepers.  Micro Engineering only makes #5 points in the On2½ range, so handlaying is the only option for other types other than converting HO points "sleeper by sleeper".  They do make a "kit" for No. 6 points consisting of a cast metal frog and machined blades, which could reduce the time and skills needed for handlaying.


Thursday, October 10, 2013

American Models Bettendorf Bogies


Bettendorf bogie on a VG van
Another source of bogies for relatively modern WAGR wagons is from American Models.  This company, based in Michigan, USA, make a wide range of S scale standard gauge locos, rolling stock and track.

In the parts section of their web site, they list a number of styles of bogies (or trucks as they call them).  The most useful for WAGR modellers are the Bettendorf freight car trucks and, for some modern Westrail era wagons, the 50-ton roller bearing trucks.

Bettendorf with "scale" wheels
50-ton roller bearing, with "scale" wheels
I first came across the Bettendoorf style when I visited Caboose Hobbies in Denver, during a holiday in the US in 1984.  I bought one pair just to try them.  That was a long time ago and, since then, I have bought two batches of 10 pairs, and asked for the bogies without wheelsets, which cuts the price almost in half.

Of course, the bogies are standard gauge so they have to be narrowed to suit Sn3½.  The Bettendorf bogies are sprung so they can be easily be dismantled - but don't lose the springs.  Kadee make an inexpensive manual uncoupling tool (#241), one end of which doubles as a "spring pic", which I have found useful for removing and inserting the springs.

The basic principle to narrow the bogies is to cut the centre from the original plastic bolster, and rejoin the two halves of the bolster.  For a while, I was using K&S 6.35 mm brass channel to splice the two halves of the bolster back together.  Recently, I went to the local hobby shop to get some more channel and they didn't have any, so I bought some K&S 6.35 mm x 3.2 mm rectangular brass tube instead and that actually worked better.
Original bolster (bottom) and shortened bolster.

The bolster is deeper towards the centre with a slope on both the top and bottom surfaces.  I found that by grinding away the sloping parts with a Dremel motor tool and "plastic" cutting disk, the end pieces of the bolster are a snug fit in the rectangular brass tube.  I found it easier to do the grinding with the original bolster in one piece, before cutting it into three pieces.  Take care not to damage the "bumps" which locate the springs.

A length of between 18 and 18.5 mm seems to work well for the brass tube.  This is based on fitting replacement wheelsets with 26 mm axles.  The bearing holes in the sideframes are quite deep and I don't think 25 mm axles would work as the wheels would rub against the inside of the sideframes.

Cut sections of original bolster with rectangular brass tube.

I drill the centre pivot hole 2.2 mm as this will take a 2-56 screw with minimal slop.  I drill the matching hole in the bottom of the brass tube a bit larger, say 2.5 mm, so that the bogie can rock a little bit from side to side or end to end.  Obviously, it is important to get the pivot holes in the exact centre of the brass tube.

I have also drilled 2 small holes in the underside of the brass tube so that I can use small screws to secure the two halves of the bolster in place although, if they are a tight fit, this may not be necessary.

The bogies I have bought have been "rust brown" in colour so I have have airbrushed them (Revell 9 "Anthracite") before reassembling them.  The current production are available in black, judging by the website photo, which would be better.

The 50-ton roller bearing bogies are not sprung, and are cast in one piece.  I haven't actually used this type, but I have seen some that have been converted to Sn3½ (and there are no springs to lose).

Update - 23 January 2014

To simplify regauging of the Bettendorf bogies, I have designed a new bolster for 3D printing.  The first test prints arrived today and they seem to have worked very well.

Bettendorf bogies with 3D-printed bolsters (grey)

Sunday, September 29, 2013

Latest 3D Printed Wagons - WMD and VG

First test print of WMD hopper wagon

First test print of VG covered van

Tuesday, September 10, 2013

WMC Iron Ore Wagon (and WMD)


My latest 3D-printed model from i.Materialise arrived on Monday, and made its debut at the September AMRA S scale night.  It is a model of a WMC iron ore wagon, the prototypes of which were built for and owned by Western Mining Corporation, and used to haul iron ore from the Koolanooka Hills mine near Morawa to Geraldton.  The mine originally operated for about 6 years in the late 1960's and early 1970's.

I have always liked these distinctive wagons since seeing photos of them hauled by A class diesels in Westrail publicity brochures from the 1970's.  (There is a photo of a long ore train on the Rail Heritage WA site.)

The model includes many details including vacuum cylinders, brake pipes, and the complex gear and chain drive system for closing the bottom discharge doors.  Details to be added by the modeller includes brass wire for the handrails, handbrake levers and two cross shaft which are part of the door mechanism, as well as fine brass chain linking the handbrake levers to the brake linkage.


Later in their long lives, many of the WMC's were converted to WMD class by the addition of hungry boards and were used for carriage of talc, wheat and coal.  A few were converted to WME class after being fitted with a closed steel top, and were used for mineral sands.  See Andy May's wagon pages for more information on the prototype.

The model currently only represents the original WMC design, but I could be persuaded to produce a WMD version with hungry boards if there is sufficient interest.  If I go ahead with the WMD version, the hungry boards would be included in the 1-piece 3D print.  As was discussed at the AMRA S scale night, the WMD version is probably more suitable for running in general traffic over wide areas of the state (see photo at Narrogin), whereas the WMC version ran in block trains in the Geraldton area.

Update:- In the 48 hours since the S scale night, I have created a WMD version with the hungry boards, and a test print of it is on order, which I will hopefully be able to display at the October S scale night.
Computer Rendering of WMD Version
In the 2000's, most have been converted back to iron ore traffic and have been fitted with air brakes rather than vacuum brakes.  The WMC's, now recoded to AHMF, were in active service carrying iron or until early 2013 when they were superseded by more modern wagons as part of the upsurge in iron ore mining in the MidWest area, and are in storage at Narngulu.

Photo by Phil Melling. Taken 24/8/13 at Narngulu
Some of the photos of the model show it in unpainted condition.  They were originally painted grey by Western Mining.  The model pictured is fitted with roller bearing bogies made by Black Diamond Models in Queensland.  These bogies are the closest I have found which are commercially available.  The sample pair of bogies which I have are fitted with Jackson (UK) wheels with steel axles, which can interact with Kadee uncoupler magnets, potentially causing unintended uncoupling.  The sample bogies are quite old and it is not known whether current production bogies have steel axles.  These bogies are cast in white metal (or similar).

I have also drawn up the correct bogies for 3D printing and I am awaiting test prints in three different plastic materials to test their suitability, particularly in terms of strength and stability.
Computer rendering of bogie currently being 3D printed.


Friday, August 23, 2013

Dm 585

Dm 585 4-6-4T

By
 
WestOzModels
 
Here is a few pictures of my latest project. 
This is the prototype model for a WAGR,  Dm class 4-6-4 Suburban Tank locomotive. 


ZBA Guard's Van

ZBA Guard's Van


Another delivery from i.Materialise today - the first test print of a ZBA guard's van.

This is the first item of rolling stock designed since i.Materialise changed their print specifications in June, and it should print well on both types of printers used at i.Materialise.

The ZBA is printed in 2 sections.  One section just consists of one side, with "everything else" being part of the other section.  This has the advantage that the roof is one piece so there is no visible join.  The join is only visible on the ends, but coincides with a vertical join in the boards.

The only details required to complete the model are the truss rods and handrails.  Everything else is included in the 3D printed parts.

The test model is fitted with the Walthers HO bogies (933-1077) which I showed at the AMRA S scale night in July, These can easily be fitted with 12 mm wheels (26 mm axle length).  

Saturday, August 17, 2013

3D Printed Relay Cabin

3D-Printed Relay Cabin

My latest 3D-printed model is a building, rather than an item of rollingstock.  

My layout needed some relay cabins to control the signalling at the intermediate stations and passing loops, about 5 relay cabins in total, so I decided to design one for 3D printing.  I already had a Westrail plan for the relay cabins installed at stations on the South-West main line between Armadale and Coolup.  Several of these are still in situ so the model covers the period from the 1950's through to around 2005, when the asbestos roof on the remaining cabins was replaced with iron, no doubt due to safety concerns, which changed the appearance slightly.

If you familiar with Google StreetView, several of the relay cabins are visible on StreetView, including those at Mundijong Junction, Keysbrook and Pinjarra.


This is my first test model of the relay cabin.  I think it has worked pretty well, and I have a second one on order at the moment.  I still need to put some "glass" in the windows.  In more recent years, the windows were boarded up.

When scaled to S scale, the relay cabin was larger than I expected - 71 mm long x 45 mm wide x 60 mm high.  Even though it is small compared to many other railway buildings, it was a relatively expensive item for 3D printing, costing around $65 (not helped by recent exchange rate variations).  For this material (Prime Gray), the cost is primarily based on the volume (cubic centimetres) of plastic in the finished model.

I have recently updated my Marbelup Models blog with further information on the relay cabin and some other 3D-printed models I am working on.

Even though the problems with 3D printing from i.Materialise in Belgium have not been resolved, and are still preventing further printing of my earlier R class diesel and CXB sheep wagon, the relay cabin and other new models have been designed with a slightly lower level of detail to suit the revised printing specifications at i.Materialise and recent prints are working well.

Monday, August 12, 2013

RailWells 2013


RailWells (apart from being the Scalefour Society’s South Western show) always has a minority interest theme.  This year it was modelling Australian railways and I was lucky enough to be invited along to demonstrate scratch building in S Scale and talk to people about the railways of WA and modelling them.   


There were layouts representing Victoria in HO and NSW in N (both modern diesel era as it turned out), a display board and computer slide show showing pictures of Australian Railways and me. This is probably the first time that there has been this much Australian modelling at a single show in one place in the UK which is why the Southern Cross features on the show badge.  


With only a six foot long table (that’s 1.83m for those reading in metric) it took a bit of thought about what will appeal to a British audience before deciding what to take with me.  They tend to like stuff which is recognisably of British origin but that little bit different.  I wanted to cover prototype themes from my chosen era (1900-1905) such as the variety of stock, traffic types, the livery changes and the private railways whilst bearing in mind that bogie vehicles take up more space (which reduces what you can display so only 1 coach).  I also needed to be able to make points about different types of scratch-building with different materials as well as kits (represented by a G 2-6-0, G open wagon and horsebox).  It’s easy to take far too much stuff and have it sit in a box for a weekend only to have to haul it back home at the end of the show so it’s rather different from going with a layout (where you want as much stock as possible). What I eventually ended up with is the models on the steps at the left of the table with my working area, photos and drawings to the right. The scratchbuilt models included  V, a pair of  I bolster wagons, N, A(MRWA), G (iron lined), J (wooden tank), AA, E, O, an unpainted 4 door R and 3 MRWA/GSR dropside wagons under construction as a batch.

There are a lot of people in the UK with family in Aus and I even chatted to one chap who had worked for the WAGR for a while in the 70’s.  It turned out to be a fun weekend flying the flag for WA in Wells Town Hall (apart from the hour long traffic jams at Stonehenge out and back) with quite a bit of interest and lots of questions.


Thursday, July 4, 2013

JV31 Midland Railway Company


Western Australian, Midland Railway Company, JV class, 1st class Sleeping Car No. 31

The Midland Railway was a privately owned railway company in WA operating between Midland and Walkaway (near Geraldton) commencing operations in 1894 until being absorbed by the WAGR in 1964.
 
The JV class sleeping cars were the last carriages built for the Midland Railway Co. being built in 1927 by the WAGR workshops at Midland. Only 3 JV carriages were built numbering 31 -33. The WAGR later went on to use the design for their own AZ class cars.
 
The picture here below from the State Library of WA shows JV 31 freshly painted in 1955.
 
 
In a 1927 report in the West Australian Newspaper, General Manager of the Midland Railway Mr J. J. Poynton proclaimed “They are the best sleeping cars on a narrow-gauge railway in Australia and as far as knowledge goes, not excelled anywhere in the world”.

 Each carriage provided sleeping accommodation for 60 persons in two berth compartments. The interior lining of the carriages was of beautifully finished Teak. Light but warm rugs made by the Albany Woolen Mills were provided for the sleeping berths finished with MR initials perforated in the centre. The corridors, considered “Remarkable”, were staggered, running half the length of the car on one side then crossing over to the other side via a vestibule with entry and exit doors, the advantages of the staggered corridors providing a better balance of weight distribution to the cars,  better access for passengers, and control of the wind draft “which is apt to whistle through a long corridor”.  
 
Other innovations included Enclosed Concertinas between cars and Water tanks under the floor with electric pumps to raise the water when required.  Automatic floodlights on the side of the cars came on when the train stopped, to light up stations at night, and then would turn off once a speed of 8 miles an hour was attained. Steps were provided at each end of the cars to allow for us at unattended sidings, a trap door in the floor of the corridor giving access to the steps when lifted and handrails swing into place “ready for use”. There could be no doubt that these cars costing approx. £7500 to build, fully equipped, would enhance the comfort of passengers and the prestige of the Midland Railway!
The Model
 
 
This model of JV 31 has been created from a WestOzModels urethane "AZ"  ½ door kit with some “creative” painting to achieve the MR livery .


The Decals have been painstakingly and beautifully reproduced by local member Rob Clarke of "Westland Models".
 

I would not normally model the MR, but I have built this carriage to assist local member Stuart Mackay who has been working on a MR layout of Watheroo for our annual exhibition for which rollingstock is a little hard to come by.

I personally prefer the WAGR greens and Creams and have got to say that after many attempts to photograph this model, Brown has to be the worst colour to photograph and get a good result. Thanks go to Bill Gray for his photo above - I believe he agrees with me.

Midland Railway rollingstock did venture onto parts of the WAGR, and so a bit of modelers license will allow my model of JV31 to fit into my future modeling intentions.


Tuesday, June 25, 2013

WAGR GC and/or MR AC wagon 3D printed

****NEWS FLASH****

NOW AVAILABLE FOR PURCHASE AT SHAPEWAYS

See below

For those that have not seen the 3D printed GC wagon I bought to the last AMRA Meeting, I thought I should post this up, this is my first post on the Blog and its just a quick one to see how it goes.

The photos are a bit blurry at the moment Im not technically skilled as a photographer and I cant find the macro button on my point and shoot.


This was printed in Prime Gray from iMaterialise like Richards R Class, but I have seen there are issues with the latest prints from them, and I wont be offering them for sale just yet until this issues are resolved as I think results may vary otherwise.

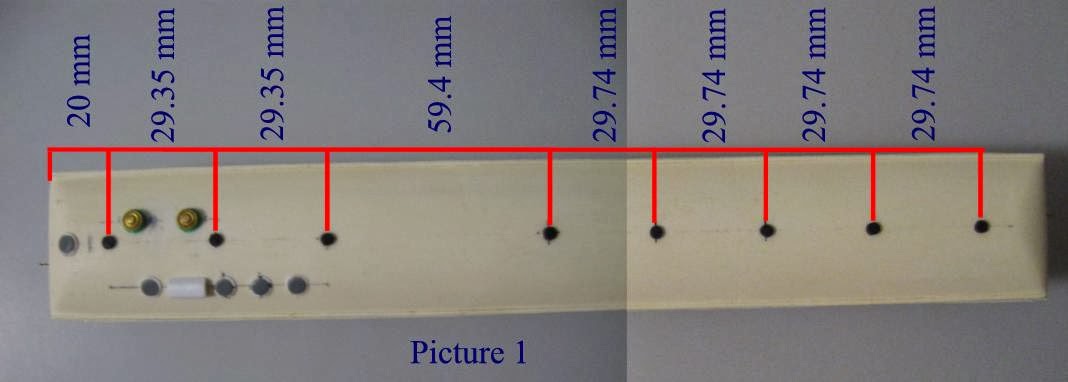
I have ordered a couple from Shapeways after a couple of alterations to improve the original, will have to see if they come out as good. And I have confirmed the shape of the chassis from AMRM issue 154 (thanks to Andy May).

More to come as they say.

Update: Painted, undecaled photos


****** Update ******

Those of you whom saw the GC wagon's last Monday would have a good idea of what I have been up to I have made this available for purchase through Shapeways, as of this evening.

I will be putting up both a molded bearing version (slip in wheels) and an untested brass bearing insert compatible version (due to some peoples desire for this option). I will order one of these to check it comes back for a good fit.

Why Shapeways and White Strong and Flexible (WSF aka Polyamide) rather than Prime Gray (PG) (by i.Materialise).

Firstly i.Materialise recently unilaterally changed the minimal detail size they will print in PG according to their Website (due to wishing to use a lower resolution printer (probably due to cost of processing). This is their prerogative but they did so while some customers had ordered believing that items would be printed correctly (the website hadn't been changed at that time), but they did not reprint using the technology they have in the past used and they have not remedied that situation. - Under Australian consumer law they should be liable for refund to customers but it remains to be seen what the remedy they will implement.

Frankly to rant on; as a 3D print bureau this is laughable behavior not only because of the customer service end, but these guys are being surpassed by home based 3D printers at almost a tenth of the cost (see formlabs.com). Good luck to them by the time they figure this out they would have lost a bunch of customers. Technology marches on the best thing about 3D printing is the resolution gets better and cheaper over time.

Secondly is cost vs detail balance.

The WSF material is stronger than Prime Gray (PG) and from three feet away, you can't hardly notice the detail difference between the two. WSF as a material is certainly capable of similar resolution in my opinion to our cast resin kits in many ways. Although due to the fine detail in my drawing of the GC rivet detail is noticeably missing from the print (see below) but if an item was designed for this material I think rivet detail is possible and equivalent to resin (you can see the tie down rings did come out on the print the same size as a rivet on a typical wagon as inspected under a magnifying glass.)

WSF does have the major disadvantage to PG, it requires a bit of work to get to look good. It has a pretty rough surface similar to 320 grit sandpaper, but I have found REPCO "Spray Putty" or similar Automotive primer/filler smooths out the rough texture well, this wagon above needed 1 dust coat of primer and 2 wet coats of the Spray Putty to look like this with out any polishing or rubbing down.
Most detail is still visible despite this process as you can see.

WSF comes in on this wagon at around about equal (maybe slightly higher) in cost to making the resin equivalent by Greg at GA Models, but a lot less work. This price though may not be that scale-able to larger items as the more volume of plastic the model has the higher the cost to produce, though this is partly true with the cost of production on cast resin, the 3D print will increase linearly by volume but the parts for "a single kit" of a wagon may continue to cost similar value with larger wagons compared to smaller etc.

Frosted Detail (FD) at Shapeways

FD is another option for those wanting a GC, this material is quite capable of similar (now even better, due to print technology changes by iM) resolution to PG, but with a slightly rougher surface, it is also difficult to clean the waxy residue that is left on the model due to the printing process, it appears on my printing a common issue occurred and that is the wax support structure got partially integrated with the plastic of the print and created a rougher surface which requires work to clean up unlike PG.

Shapeways recommends a process on their website, but a good scrub with dish soap and then a bath with white spirits does a reasonable job to start with.

NB: The main issue with the FD is that some items were broken off I am sure during post processing and the model will need repair and replacement of broken parts if you get one so be warned (this did not happen with PG by i.Materialise)

Purchasing

So for those interested in 3D printing you can now order a copy in WSF or FD, but I am willing to take orders to make it a bit cheaper (I have six drop-in wheels molded baring WSF on the way) I can offer for sale $25.

You will need to compleate: Kadees (medium underset shank), paint, 12x26mm spoked wheels (Railwest), and 0.5mm brass wire for brake rodding.

I am getting a PG GC from iMaterialise (soon I hope) to see if my model will print in their new process but it seems to be taking a very long time. If that is successful I will put that up as an option as well.