
Monday, March 16, 2026

Sunday, March 1, 2026

Saturday, October 4, 2025
More progress in the Westrail fleet
Hey hey, since my last update on the Westrail D, DA and AB, Dave Luketic has been plugging away at decals and tidying up of the paint. As you can see in the following images, they really are looking the part.
What you will note is a lesson I have learned from making a mistake on DA1571. I installed the headlights before painting and as such the paint has gone over the fibre optic cable. I hope these can be carefully scratched off but I learned my lesson and D1562 and AB1535 haven’t had lights installed prior to painting.
This hobby is sometimes only learned through making the mistakes but try to learn from other people’s mistakes if you can. Not much left to do but reassemble them.


Monday, March 24, 2025
It’s not Patience, It’s Persistence

Hey hey, do you often get people come up to you and compliment you on your models whilst also self deprecating their own skills and abilities? I know I’m guilty of it myself but when you see a beautiful model loco someone has put hours of time and effort into, you can’t help but compare yourself to that person, the Modeler who has probably been in the hobby longer than you’ve been alive. That person only sees the end product, not the countless hours and persistence you have applied to get that model the way it appears to them.

Of course there’s the age old “oh I could never do something like that!” Or “I haven’t got the skills that you have”. But one thing I have learned having been both people in this situation is it’s not skills or talent that make the model. Skills are something you can learn and takes practice to develop, anyone can do that. What is really required is persistence; persistence to master that skill, persistence to find that knowledge, persistence to avoid that error next time. It’s not the same as patience (although that can help) but it’s not giving up the first sign of something not going right the first time.

I recall seeing Gav Stallard’s scratch-built DB at an exhibition one year and thinking exactly what I described above, that I’ll never achieve what he had achieved at that stage. I of course never saw how long or how many times Gav made a mistake. I look back now and whilst I didn’t build the DB I own today, I have assembled locomotive and wagon kits with the confidence to say that you too can get there one day. So my response to those who say “I’ll never be as good as you” would be “given the right amount of persistence, you too can be as good if not better, don’t give up at the first mistake or hurdle”.
Thursday, March 20, 2025
The XW Wagons

Hey hey, as many of you have already seen, I have been working on some Marbelup Models 3D print and etched XW wheat wagons.
http://westralia.uk/xw_wagon.htm
For a prototype history, see Andy May’s page on the XW. I have concentrated on the XW and XWA as the only change was the coupler between these two variants. I have backed this up with photos of XWs from the RHWA photo collection.
https://marbelupmodels.blogspot.com/2019/07/xwxwa-wheat-wagon-assembly-tips.html?m=1
These have been a relatively easy kit to construct and credit goes to Marbelup Models for designing such great and detailed wagon. The first part is of course cleanup and like any kit it is rather tedious and boring but done right, with the correct tools, it’s a rather quick and painless process.

Assembly of the bogies is much like any other Marbelup Models wagon with two halfs screwed together and top hat bearings with North Yard wheels.

One disadvantage to the clear resin used by iMaterialise is that it does get difficult to distinguish between what is parts sprue and what is detail. So prior to final cleanup, I sprayed the wagon with Tamiya Fine white primer. From here I could then add the Brass etched ladders and walkways, a rather easy step once you know where they go.

At this point is where one wagon rolled off the bench to the floor bouncing once on one end making a single piece kit into a multi-piece kit. Due to the brittleness of the resin used, the bogie came off the screw that was holding it in place. That meant getting a bigger screw to fix it back once it was glued back together. Other minor parts broke such as the vacuum hose and the brake wheel which I was able to locate and reattach with Zap-a-gap green CA glue. The hardest part was fixing the end platform supports which I found most of the parts except for the diagonal struts. Those I had to fabricate out of styrene and once painted, you couldn’t tell which was the broken one.
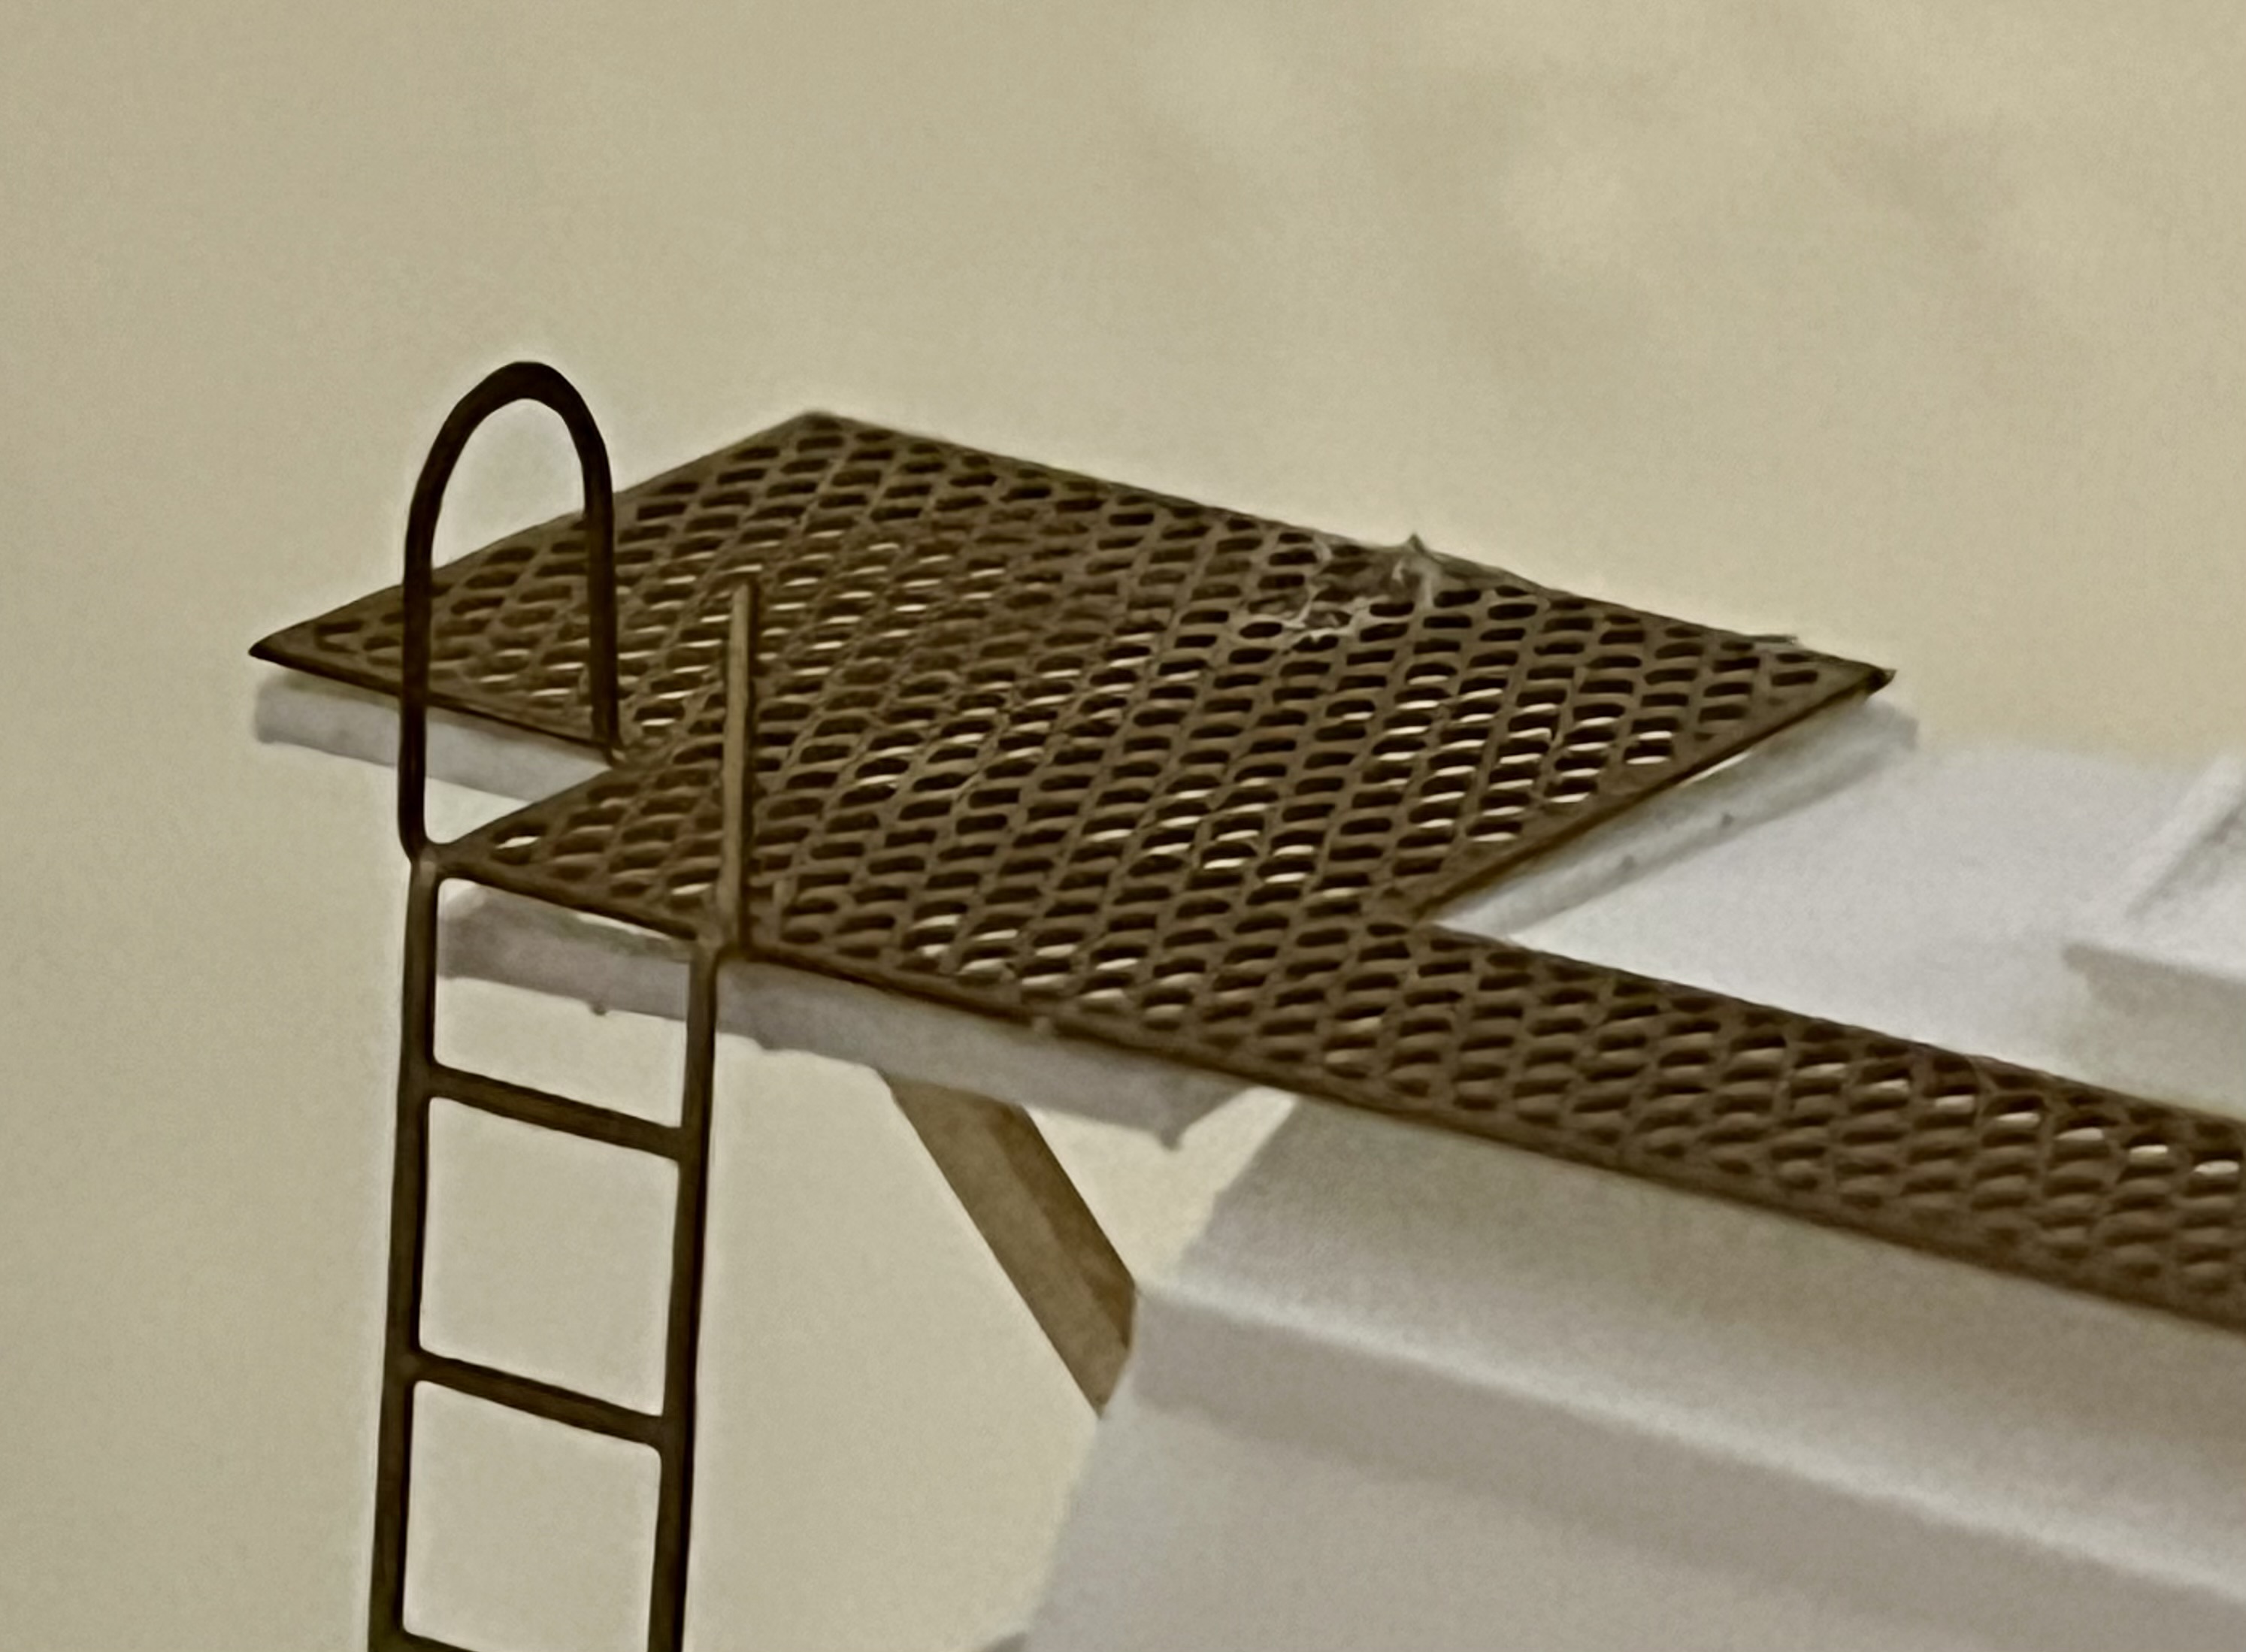
The platform supports were further strengthened when the brass etch was glued and held in place with pegs while it dried. Another layer of Primer later and the wagon was ready for paint.

The yellow used was again Tamiya spray “Chrome Yellow” which I believe is a close match to the WAGR/Westrail yellow used on their wagons. I went in a bit hard and fast so the paint came out rather thick, but other than that, they look good and I knew from experience that decals and weathering will improve the model.

For the XWs with the large “WAGR” on the side, they came out with white roof hatches and since they were only press fit and not glued on the kit, I removed them prior to adding the yellow. These decals were drawn up by Richard Stallard in Corel Draw and sent to Hobbyist Decals which are now located in India. Whilst I was doing this, I had the same decal company draw up Westrail versions of the XWA. The Westrail versions have subtle differences but are based on photos I have found either on Andy May’s site or the RHWA site.
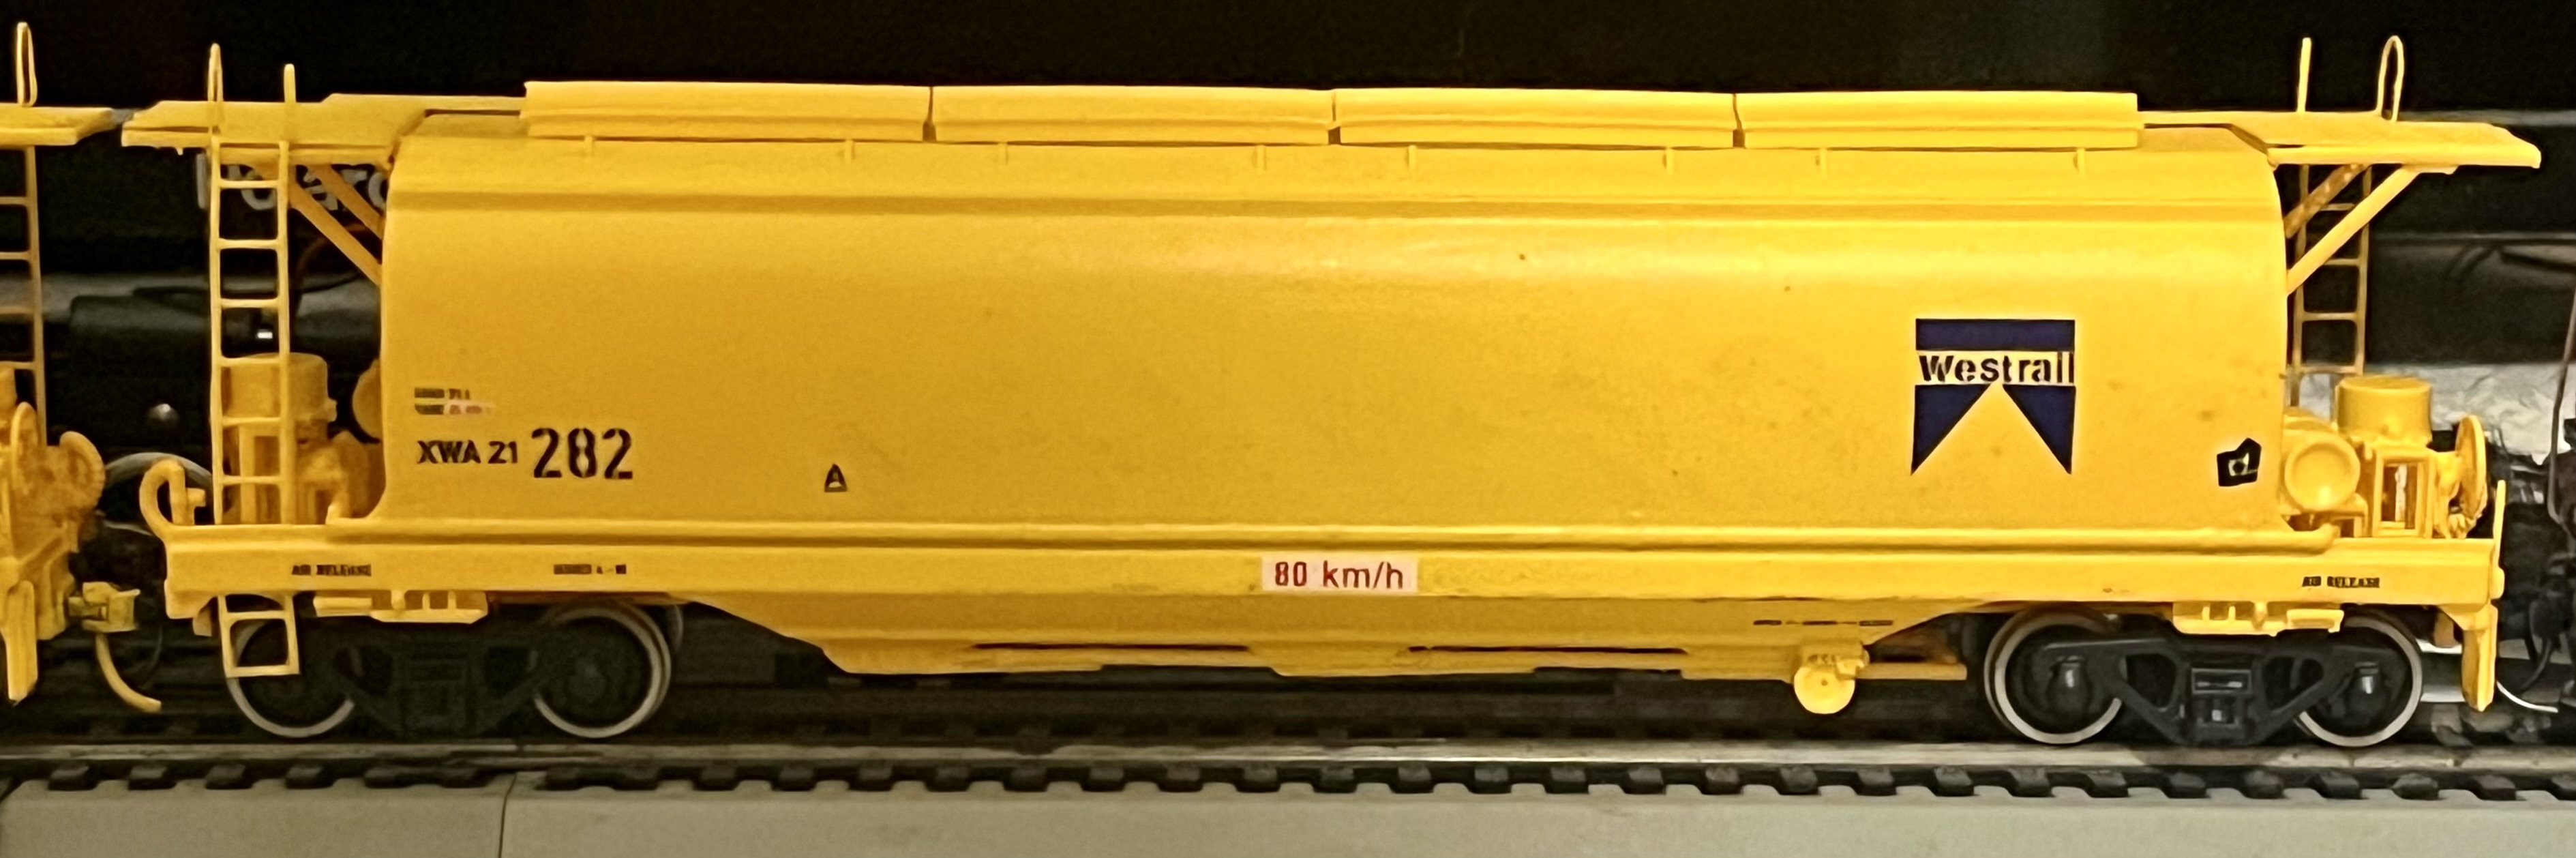
I applied these in the same manner as previously I have done on the LA hoppers although these were larger and little harder to handle. I followed this up with Testors Dullcote however I have run out and cannot get anymore in Perth so they are on order from the eastern states. A couple more layers and I can say these 3x are finished and ready for weathering.
They will look good in a rake with the other 5x I have to complete or mixed in with the RCHs from GA Models. As you can see from the last photo of P2005 leading a rake of XWs, the large “WAGR” branding lasted quite a while and even into the 90’s so it would be plausible that they ran with DBs on the lead too.
 |
| Photo courtesy Simon Barber |
Sunday, January 12, 2025
Garratts and 2025
Hey hey, happy new year and welcome to 2025. This year is shaping up to be a big one and kicking off the first S scale meeting at AMRA WA is a round-up of Garratts. For those who are not attending, here is a sneak preview:


There’s also plenty more exciting stuff coming up in 2025 so stay tuned.
Friday, September 27, 2024
Modeling Mojo
Hey hey, recently I have been having some trouble trying to get inspiration for what I model or as I like to call “Modeling Mojo”. This can be particularly difficult for many of us who model things that no longer exist, especially if it’s related to the steam era. If you have ever felt a bit burned out and just “not in the mood” then chances are you’ve experienced this loss of Mojo. Ill health, travel and life in general are all contributing factors to this phenomenon but don’t worry, it’s a common thing and more often than not it will return, just be patient. Cliché I know but it’s true, everyone comes back eventually. There’s a reason why you liked it in the first place right?
There are many ways to help relieve this feeling of almost boredom, some involving just walking away for a while and doing something else (preferably before you throw that latest project at the wall). One of my go-to ideas is to do some digging, no not the kind that involves a shovel. I’m talking about researching your chosen prototype which can be as simple as going online and looking at old photos. There are some great resources out there and they are continually being updated so it’s worth spending a day or so doing some digging because you might come across something new to you. Other ways I get inspired is chasing trains (the real thing). This might be a bit unique to my circumstances as I model more modern locomotives and rollingstock (when I say modern, I’m talking 80’s-90’s era) and many of these trains still exist today either in preservation or with smaller rail companies. However preservation groups such as RHWA and Hotham Valley are still great sources to get your steam fix for those modeling earlier eras.
I highly recommend if you’re struggling with that Mojo, it will do wonders to the senses if you visit your local preservation organisation. I know my recent experience with Hotham Valley did for me. What’s your Mojo fix?
 |
| F40 with Hotham Valley meets my F44 model in S scale. |
Monday, August 5, 2024
Progress on the Westrail Loco fleet
Hey hey, just a quick update on the Westrail loco fleet. I have employed Dave Luketic to use his magic and paint my D, DA and AB locos and so far they look magnificent. I won’t bore you with much else here and you can be the judge yourself from these photos below. For a quick reminder, these are Marbellup Models 3D prints I assembled but still require a few finishing touches such as handrails, lights and decals. The chassis still require painting but if the bodies are anything to go by, they should turn out great.
 |
| D1562 |
 |
| DA1571 |
 |
| AB1535 |
Sunday, June 16, 2024
2024 Model Railway Exhibition
Hey hey, just a quick reminder that the 2024 Model Railway exhibition is coming up on the 22-23 of June 2024 with S scale represented by Stuart Mackay’s Denmark layout and modeling displays plus information desks supporting the layout. Hope to see you there.
 |
| Exhibition Flyer featuring S scale locomotives built by Ben Rudd. |
Saturday, March 30, 2024
GA Models LA Ballast Hopper
Hey hey, since my last post I have continued to remain busy making models each Thursday at AMRA WA with other members of the S scale group, my latest project being a GA Models LA Ballast Hopper. I must say this has turned out to be one of the better kits I have assembled and I’m rather pleased with the end result.
 |
| The kit as it is sold. One must still supply vacuum pipes, wheels, W irons and couplers. |
The kit needed very little cleaning of parts and glued together with Zap CA glue with ease. To understand the wagon’s design better, I happened to come across a preserved LA wagon in Mingenew when up that way visiting family. The photos were useful in especially working out the vacuum through pipes.
 |
| LA wagon plinthed at Mingenew Station. |
This was a preserved wagon but far from the right colour for an LA in later years of service which is what I chose to model. Luckily a few images of the LA in Westrail service appear on the Rail Heritage WA website which I found to be great reference photos. Using this photo and some very rudimentary measurements from the wagon, I sent off to Custom Hobby Decals in QLD to get the decals made. At under $70 for a set of 5, I’d recommend them again. This is the same company that made the decals used on my DB and F class locos.
 |
| LA23811 image courtesy of Rail Heritage WA. |
This image lead me discover one big part missing from my nearly completed model… hungry boards. So I turned to the one place I know I can get great advice; the Thursday modeler’s group. With a bit of experimenting with styrene, and a lot of encouragement, I created some hungry boards which turned out rather well.
 |
| The kit assembled as per the instructions. |
 |
| LA kit painted in Tamiya TS1 Red Brown with added hungry boards. |
Whilst I waited for the decals to arrive, I trialed some colour on the LA model. When I sprayed the first coat of Tamiya TS1 Red Brown, I took some time to look at the wagon compared to prototype photos and found that I was not happy with the shade of Brown. That’s when I returned to my Thursday modelers brains trust and discovered Dulux red oxide primer which is much closer to the WAGR/Westrail colour.
 |
| Comparing the Humbrol H70 (GE wagon) with Dulux Red Oxide Primer. |
Once the decals arrived and I was happy with the colour, I sprayed a layer of gloss clear coat to give a smooth surface for the decals to adhere to. Once dry, the decals were soaked in water with a few drops of Micro Sol solution and applied to the model. These decals are really easy to work with and the size was spot on.
 |
| The finished and decaled model. |
The last steps to go is to dull coat over the top and weather but I think that’s for another blog post. Now to start the next 4x LA wagons.
Sunday, January 28, 2024
Bencubbin
2018 saw Bencubbin as the S scale layout exhibited at the AMRA model train show
The layout presented by S scale modeler Greg A with assistance form the S scale group was well received by the viewing public
Check it out at this link below
Bencubbin - Model of a WAGR Wheatbelt Station at 2018 AMRA Model Railway Show (youtube.com)

Saturday, December 30, 2023
Westrail Models F class
Hey hey, long time, no post. I have been busy over the last few months after leaving the AMRA WA Committee. I managed to acquire two F class locos from Westrail Models and whilst a little work was required to get them to run smoothly, they are great locomotives. I did manage to break the window on F40 (as preserved) so that is not in the limelight at the moment till that is fixed. But just before Christmas, I finally received the cab for my second F; F44 in green. I’m very happy with it and looks great hauling a train of yellow wagons around Swan View (see below). Anyway I hope you all have a safe and prosperous New Year in 2024 with lots of modeling.


Wednesday, June 14, 2023
East Guildford Layout
East Guildford was the layout presented by members of the WA Sn3.5 Group and AMRA at the 2023 Model Railway Show.
The layout represents East Guildford station which is a suburban station 12km from Perth on the Eastern mainline to Midland, Kalgoorlie and Beyond.
Originally opened in 1896 as Woodbridge and later changed to East Guildford in 1908
The railway and station sit on the highest area of land at the neck of a peninsula of land bounded by the Swan and Helena Rivers. This area of land known as Guildford when settled was deemed to be a good location for a navigable inland port on the Swan River to serve the eastern lying farming areas and became the first terminal of the railway from Fremantle in 1881. In 1884 the railway was extended to Chidlows Well passing through the area that would become the next station on the line - East Guildford.
The layout features the station area with its sidings servicing the Peerless Flour Mill and Douglas Jones Timber mill modelled in the late 50's to early 60's.
Many members were involved in the build of this layout which was commenced in early 2019 led by the late Murray Hartzer who sadly passed away during the layout build. Many of Murrays vehicles can be seen on the layout in his memory. Amid the issues of the Covid pandemic the construction of the layout continued to culminate in its display this year when AMRA held its first show since 2019.
The layout was awarded the only two trophies to be presented in 2023, being the Jack Stanbridge Trophy, which was for the best layout as voted for by the other exhibitors, and the AMC People’s Award, as voted for by the visiting public.
Thank you to all who contributed to the build of this layout!
Here are a few pictures from the show.

East Guildford Station


Peerless Flour Mill

East Guildford Station


Peerless Flour Mill

Douglas Jones Sawmill

In real life Peter Trinder from the UK captured Pr 536 and Pm
hauling a train past the Peerless Flour Mill in 1962

Kieran Wrights capture on the layout.


W class shunts the sidings outside DJ's Sawmill
A video compilation can be found here
(484) East Guildford Station Western Australia - 2023 AMRA Model Train Show - YouTube
Subscribe to:
Posts (Atom)